The 'Jobs to invoice' shows all jobs that have been completed and are ready to be invoiced or sent to the batch queue, this defaults to 3 months worth of jobs to invoice.
Once the job has been completed, its status colour in calendar view will change from blue to grey.
- Access Jobs to Invoice page
- Search for jobs
- Filter by Status
- Filter by Date
- Columns
- Filters
- Preview and Send Invoice
- Splitting an Invoice / Add Recipient
Access Jobs to Invoice page

Click the 'Jobs' on the left-hand dashboard, then click the 'Jobs to invoice'.
Search for jobs

In the 'Search jobs' field, enter contact or pool details to auto-search.
Filter by Status
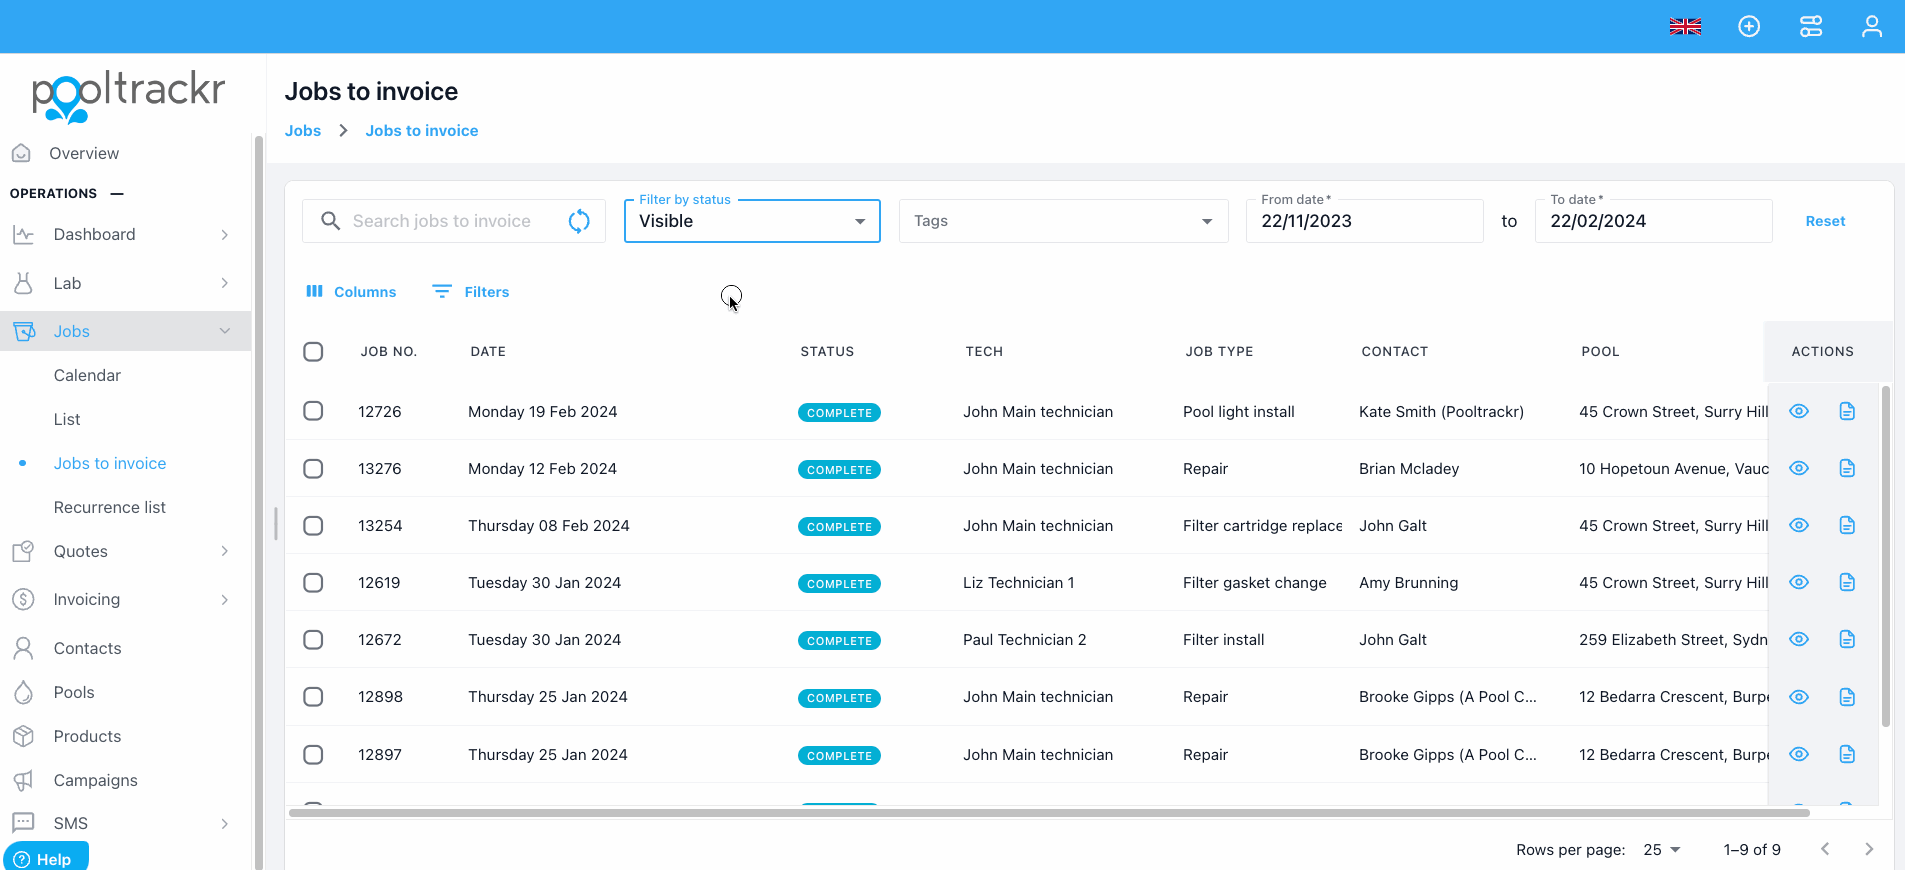
Click the 'Filter by Status' drop-down box at the top of the screen.
Select which status you wish to filter by:
All
Visible
Hidden
Filter by Date

Click the 'From date' and enter the date you wish to start the search. You can enter the date manually or select the date from the calendar.

You can also search by the following by selecting them:
This Week
Last Week
Last 7 Days
Current Month
Previous Month
Next Month
Click the 'Reset' on the right-hand side of the date to reset the date filters.
Columns
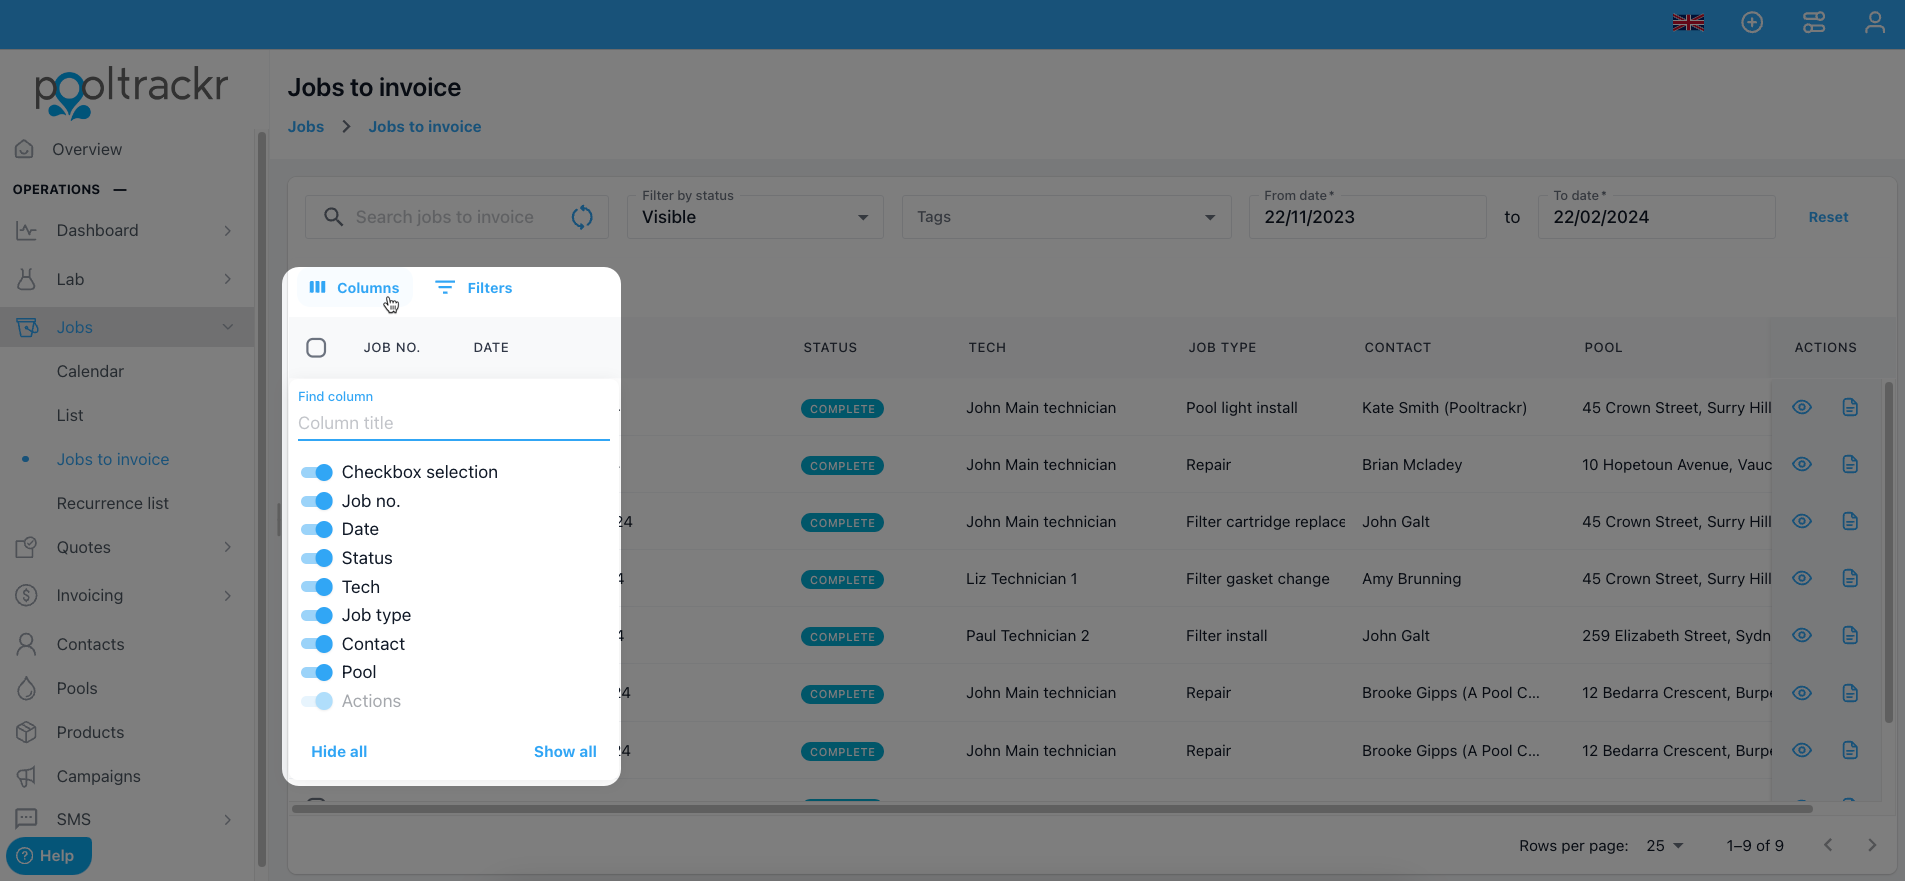
You can use the columns tab to adjust the columns shown on the page. You can also sort and pin columns by hovering over a specific column heading and clicking the three dots. Click the 'Columns' tab at the top left of the jobs list.
Select what you do and don’t want to be displayed in the columns via the toggle switch to the left-hand side of each choice or click 'Hide all' or 'Show all';
Checkbox selection
Job no.
Date
Status
Tech
Job type
Contact
Pool
Filters

You can also add additional filters for the displayed job information. Click the 'Filters' to the right-hand side of the 'Columns'.
Select 'Columns' filters;
Job no.
Date
Tech
Job type
Then select an 'Operator';
=
!=
>
>=
<
<=
Is Empty
Is not empty
Is any of
Then select Value
You can also add filters by selecting + 'Add filter' or remove the filters by clicking 'Remove all'.
Preview and Send Invoice
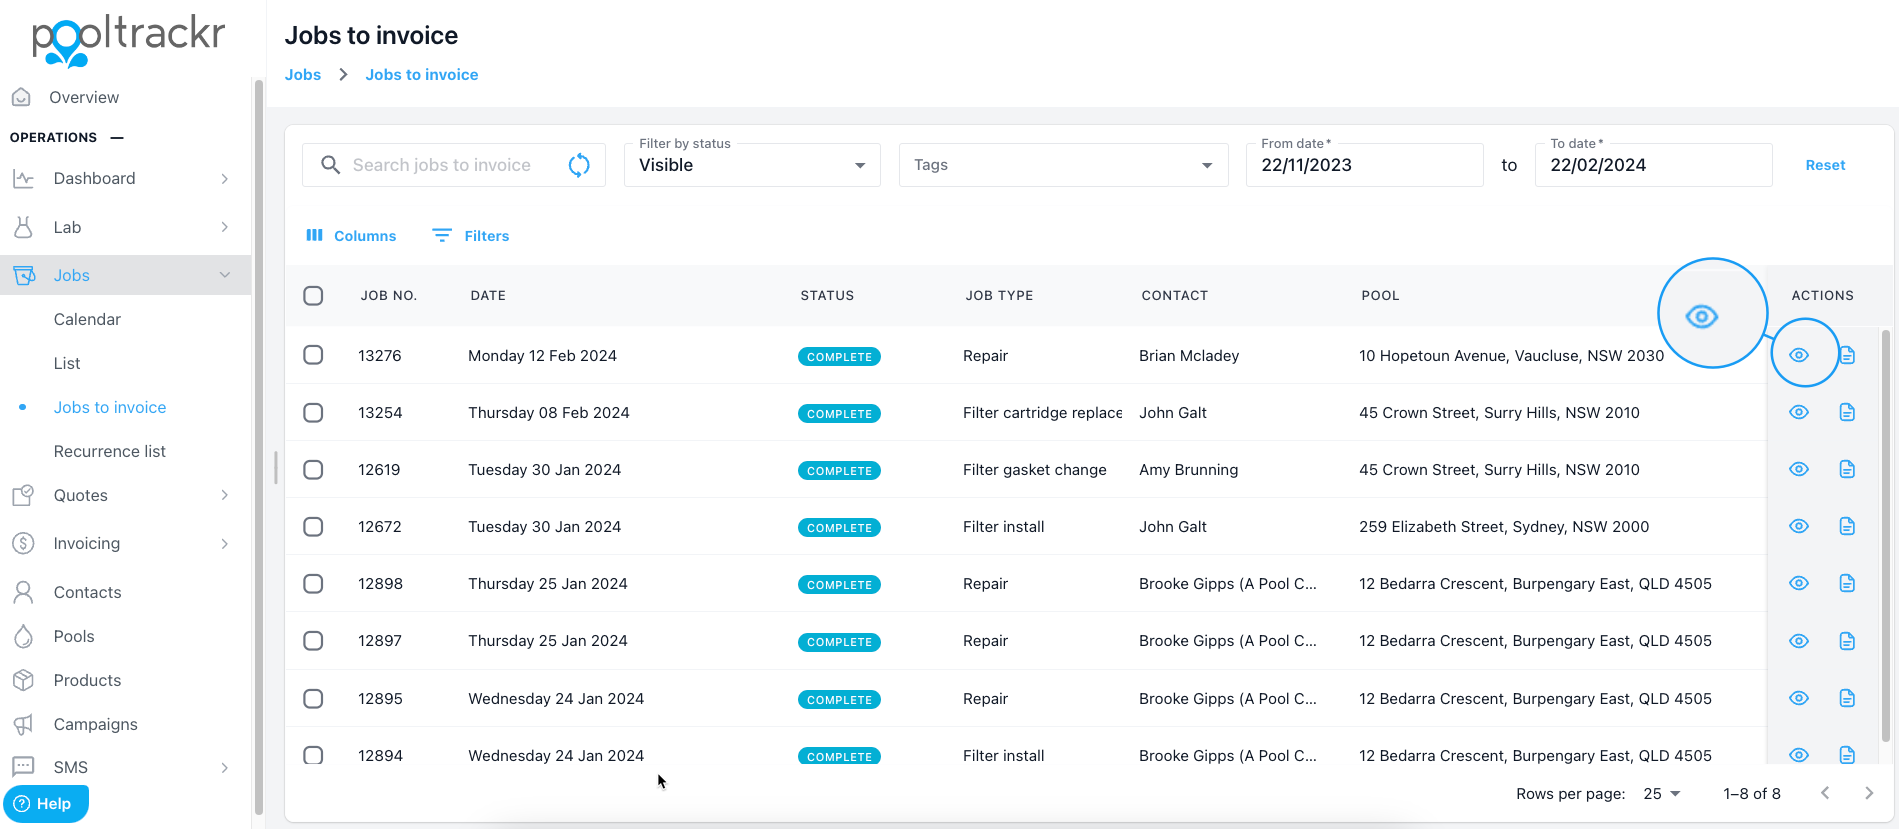
You can preview the job before invoicing by clicking the job or hide the job to be invoiced by clicking the hide invoice icon to the right of the job. This will hide the job to invoice but retain all the info.
Click the job to preview and send an invoice.
Scroll down and check that the job information is correct. You can edit or add items at this stage before generating an invoice.
Click the 'Actions' tab at the top right-hand corner of the page.
Click the 'Preview & send Invoice'.
You can select to use a custom invoice ID
Change the date of visit, issue date or due date.
Splitting an Invoice / Add Recipient
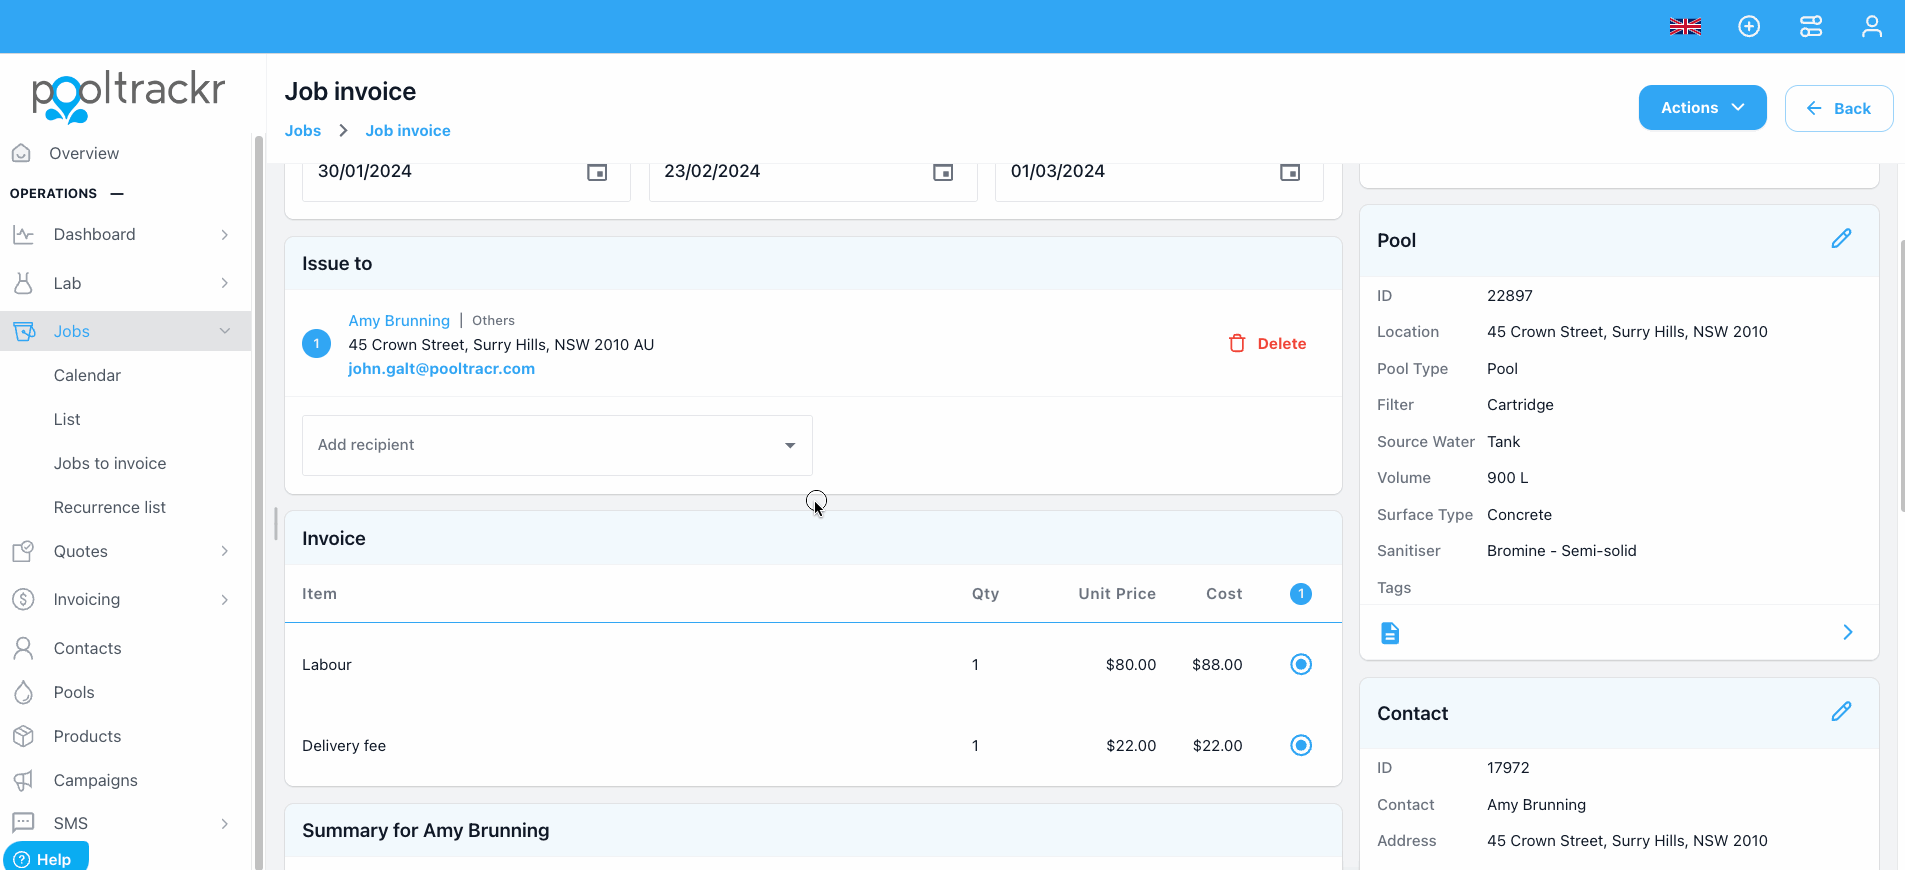
You can add or remove recipients to or from an invoice, or generate split invoices for each recipient, the recipient contact details must be linked to the same pool. Click on the 'Delete' icon of the recipient to remove. Click on the 'Add Recipient' drop-down to add different or additional recipients to an invoice.
You can select the recipient you want to add. You will see numbers next to each added recipient.
Scroll down to the 'Invoice' section.
Select which products each recipient is to be invoiced for by clicking the corresponding numbers on the right-hand side of the products.
Each recipient's totals are displayed below the invoice items.

- Click the 'Actions', then 'Send' the invoice to the customer from Pooltrackr
or
- You can click 'Mark as invoiced' to generate the invoice but not email it from Pooltrackr.

The send option is unavailable, meaning a contact doesn’t have a linked email address.
Was this article helpful?
That’s Great!
Thank you for your feedback
Sorry! We couldn't be helpful
Thank you for your feedback
Feedback sent
We appreciate your effort and will try to fix the article